August 31, 2011

Close to my Heart Giveaway!

As some of you may already know, a couple of weeks ago I mentioned a CTMH giveaway.  You will find the initial information on my post Another CTMH project featuring ROXIE WOTG.  But here is a quick overview:

For the next couple of months I will be keeping track of customers who purchase kits, stamp sets, or other goodies featured on my blog.  On January 1, 2012, I will be holding a drawing to give away an assortment of CTMH goodies.  For now I will keep the prize a surprise (plus I'm still working out the details).  But if you are inspired by what you see here to create something similar, then head over to my CTMH site and start shopping.  Be sure to leave me a message here or on my Facebook Page telling me that you visited my site and did some shopping.  I will verify purchases with my site and place your name into the drawing.

HERE IS THE EVER IMPORTANT INFORMATION:  To qualify for the drawing you must place an order on my CTMH site for any product featured here on my blog, then come back here and leave me a message on the original posting.  OR, place any order through my CTMH site with a retail price over $100.  All qualifying sales over $100 retail from my CTMH site will be added to the drawing, no need to come back and post.  Each qualifying order counts as one entry, however, customers will recieve additional entries for each $100 spent (so two entries for a $200 order, three entries for a $300 order and so on).  THIS CONTEST IS FOR SALES FROM MY CTMH site SITE ONLY. 

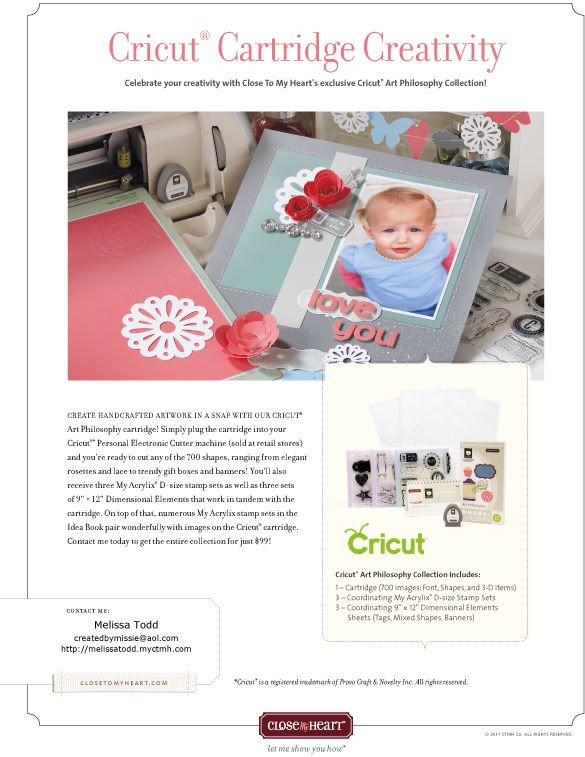
I want to give a big shout out to GinaJ from Illinois who is my first customer to qualify for the drawing.  I have decided to sweeten the pot!  With every entry into the drawing I will add one goodie to the prize package!  My goal is to include stamps, inks, markers, embellishments and other CTMH goodies.  But to start us off with a BANG I am going to make the first extra goodie a CRICUT CARTRIDGE!  I am going to be adding a page link to the top so that you can keep track of all the goodies in the "basket".

August 21, 2011

A simple slider card

Yesterday I was able to attend Scrapbook Expo in St. Charles, IL.  I had a great time with some of my crafty friends.  The show had lots to see and do, and I really loved seeing all of the beautiful projects.  One card that really caught my attention was a double slider card.  So this morning I did a google search to find out how to recreate the card and found a lovely youtube video with directions. 

I did a quick double slider using scraps to figure it out.  Then I set off to make a card.  I love all of the great 12x12 papers on the market that have small journaling cards, so I decided to try a small slider card using one of these journaling cards as the inspiration.  This card measures just over 3 inches by 4 inches, and has just a single slider, but I love the way it turned out!  And because the inside paper that I used was intended to be a journaling box, the pattern is perfectly sized to fit the paper, and there is room to leave a note!  Let me know what you think.


August 19, 2011

Thank you cards, using scaps from the Roxie WOTG


WOW!  I am truely impressed right now with all I have created using the Roxie workshop on the go kit!  The preview for this kit suggested that you would be able to make a 2 page layout and a few cards using the included supplies.  However, so far, I have made 7 cards, 3 12 x 12 scrapbook pages, and I still have materials left! I am so impressed with the Close to my heart kits that I plan on ordering a few more soon.  Stay posted to those projects soon.

For today I would like to share with you a set of thank you cards I made this afternoon.  These are pretty quick cards, but I really loved the way they turned out.  I made 6 of them and have a special use in mind for them already.  I can't wait to send out these thank you cards. 

Ok, so I used mostly scraps from the Roxie Workshop On the Go (WOTG) Kit.  I only added 3 sheets of craft card stock (8.5 x 11 cut in half to make the card bases) and a hand full of gems.  Other than that I used scraps from the kit. 

Recipe:
Craft card stock base card front measures 5.5 wide, 4.25  high
6 pieces of patterned paper cut to 5.5 inches by 4.25 inches
6 pieces of neutral paper cut to 1.25 inches by 5 inches
6 pieces of pink paper cut to 2 inches by 3.5 inches
18 medium sized gems
One alpha stamp ( I used CTMH E1021 Trinity Alphabet) or thank you stamp


Here are a few quick pictures of the other projects created with this kit.  Be sure to check out the links below the photos to see more from each project.

http://createdbymissie.blogspot.com/2011/08/another-ctmh-project-featuring-roxie.html


http://createdbymissie.blogspot.com/2011/08/today-is-big-day.html

August 16, 2011

A couple of quick cards, blending CTMH with existing supplies.


This past weekend I made a couple of quick cards based on a pattern I found in the Close to my heart idea book.  The original card looks totally different, but if you look closely you will see a similar layout pattern.  Here is the original so you can compare:


To make the cards I started with craft cardstock that I had on hand.  It is not CTMH brand, but as I have a ton of scrapbook paper I wanted to experiment with mixing some of what I alreay own with some of my new CTMH goodies and ideas.  The card base was cut to 10 inches by 5 inches then scored to make a 5 inch by 5 inch card. 


Using the My Acrylix, Happy Clusters stamp set, I stamped the star image on white paper, then trimmed the star and inked the edges.  After that I placed buttons and gems on the star to using the inked image as a guide.  Finally I topped the star off with a small piece of twine. 

After that, the card went together quickly by trimming some papers I had on hand to fit the card base and adding a couple of gems to the card base.  I also used a stamp that says congratulations (not sure what brand, but not CTMH). 

There you have it, a couple of quick cards combining some old goodies and some new toys. 


August 12, 2011

Another CTMH Project Featuring the ROXIE WOTG

I have been playing with the Roxie, workshop on the go, again today.  Using only the left over peices from the kit (see yesterday's post for a 2 page layout already created with the kit), I created another layout today.  Faces and names have been blacked out as requested by the people in the photos.  This is a family member's wedding photo.  I am so pleased with how it turned out and hope you will be too.

\


Todays featured items are the Roxie work shop on the go kit, and the Love life stamp set.  Purchasing either of these items through my web site at full retail value will enter you into my prize drawing.  Here are the drawing details:

So, here is some information you don't want to miss.  For the next couple of months I will be keeping track of customers who purchase kits, stamp sets, or other goodies featured on my blog.  On January 1, 2012, I will be holding a drawing to give away an assortment of CTMH goodies.  For now I will keep the prize a surprise (plus I'm still working out the details).  But if you are inspired by what you see here to create something similar, then head over to my CTMH site and start shopping.  Be sure to leave me a message here or on my Facebook Page telling me that you visited my site and did some shopping.  I will verify purchases with my site and place your name into the drawing. 

*To qualify for the 1-1-2012 drawing you must make a purchase through my CTMH site including a featured item.  All orders more than $100 will be entered regardless of items purchased.  Qualifying items must be placed online at full retail value.  Happy shopping


August 11, 2011

Today is the big day....

This morning I took my boys to a local park just to get out of the house.  We ran some errands had lunch at Sonic and in general wasted away the morning.  When we got home we found a lovely surprise. 


The FedEx man had dropped of my Close To My Heart consultant kit!  I was shocked.  Yesterday when I checked the tracking number FedEx was saying it wouldn't arrive until Friday.  Well, thank goodness, by the time we got home it was nap time :)  So I put the boys down for naps and dug into the package! 

This afternoon I worked with the Roxie Workshop on the go Which can be found on page 25 of the current idea book.  I loved the look of this kit, but was a little hesitant to purchase it as it seemed much girlier thank my typical scrapping.  OMG!  I am now in love with it.  I did a simple to page layout (instructions included in the kit).  It is just amazing.  I can't believe I did this in just an afternoon.  So, here are the layouts:


I choose to alter the layout a little to accomidate the direction of my photos, and because I don't like to journal!  But I simply love the way it all turned out.  The best part is, there are still plenty of pieces left in the kit and I will be able to make more layouts or cards with the remainder of the package. 

So, here is some information you don't want to miss.  For the next couple of months I will be keeping track of customers who purchase kits, stamp sets, or other goodies featured on my blog.  On January 1, 2012, I will be holding a drawing to give away an assortment of CTMH goodies.  For now I will keep the prize a surprise (plus I'm still working out the details).  But if you are inspired by what you see here to create something similar, then head over to my CTMH site and start shopping.  Be sure to leave me a message here or on my Facebook Page telling me that you visited my site and did some shopping.  I will verify purchases with my site and place your name into the drawing. 

*To qualify for the 1-1-2012 drawing you must make a purchase through my CTMH site including a featured item.  All orders more than $100 will be entered regardless of items purchased.  Qualifying items must be placed online at full retail value.  Happy shopping. 

August 10, 2011

New Valences

Today's afternoon craft project was new valences for my craft room.  This is the one space in the house that gets to be girly.  I have two little boys and I am way outnumbered by the male gender.  I am determined to make this room as pink as possible.  My husband wouldn't agree to letting me paint the wall pink as it has french doors with glass pannels that opens into the entryway.  So, the compromise was to use lots of pink accents. 


My DH finally got my cricut cartridge shelves up this morning too.  Looks like I need at least one more shelf.

August 9, 2011

Project of the day

My friend Linda just called to inform me that my "Visiting a Farm" layout was selected as the project of the day over on the Cricut Circle Blog.  I'm so excited that I thought I would share that with all of you.

August 8, 2011

Catching up....OHIO SWARM

I am a bit behind in my blogging, so for the next few days I would like to share some photos from the recent Cricut Circle Swarm in Ohio.  I was lucky enough to get to take the trip with three of my local circle friends and we really had a blast.  While I enjoyed the overall event, I think PC needs to get their act together when it comes to these events. 

Today's photos are from the road trip and the dinner Thursday night, hosted by Paulette.  Thanks again Paulette for organizing the dinner for us!


Getting ready for the roadtrip, Janice and Tina applying a vinyl decal to my car.


Finshed design. 


Elizabeth (makeup girl) and I at the dinner.


Paulette (scrapaulette) and I at the dinner


Michele (greengirl) and I at the dinner


Mike and I at the dinner


Jan squared....IE Janice A and Jan Schmeckpeper


Jan and Linda

August 6, 2011

Close To My Heart

I am so excited to share some news with all of you!  I have decided to join the Close to My Heart family and become a consultant with them.  I have always enjoyed their products.  Now that they have added a line of cricut product I knew it was the right time for me to join.  I will from time to time be featuring  projects on my blog and I promise to include an ordering special with every project!  How can it get better than that?  Thank you all for your friendship and support!

I wanted to get you all started with a special on the new Cricut Cartridge, Art Philosophy Collection!  If you contact me via email to order this cartridge I will extend a new customer discount of 20% off the retail price of the cartridge.  This order must be placed directly through me, and not through the website. 

Missie

August 4, 2011

Cricut Circle Monthly Challenge- August 2011

This is my entry for the Cricut Circle Monthly Challenge.  If you would like more information on the challenge please see the details at the bottom of this post. 

While I never win the challenges, I do enjoy the inspirations.  I have been in a bit of a crafting funk with the move and all.  It is a personal goal to do at least one crafty thing/ project per day for the next few weeks.  My fall semester begins on the 23rd and I want to get as much crafting in as possible before then.


AUGUST MONTHLY CHALLENGE: Create a Scene Challenge!

There are so many fun Cricut cuts available on our cartridges including trees, buildings, backgrounds, flowers and more! For this next challenge, we want to see you utilize these cuts by creating a scene on your project.
The random winner of this challenge will receive a $150 Credit to Cricut.com!

The Challenge: Create a project of your choice utilizing your Cricut Cut Images to create a scene! (You are not required to use it, but your latest Circle Exclusive cartridge, Pop-Up Neighborhood, has tons of great images for building a scene!) Your project must include atleast 2 different Cricut Image Cuts.
Rules and Guidelines: Circle Blog Challenges are open to Cricut Circle Members only. You can create any type of project you would like (tag, altered project, mini album, etc.) but your project must be newly created for this challenge and include atleast 2 Cricut Image Cuts. You must submit a project to be entered into the Challenge Prize Drawing.
How to Enter: Submit your entry using the InLinkz tool found at the bottom of this post. Please post your full name along with your entry. Entries are due by 9:00 pm MST on Tuesday, August 30th, 2011.
Prize: This month the winner will receive $150.00 in credit to Cricut.com.
Winner: The winner will be selected randomly from qualifying entries using www.random.org and will be announced on the Cricut Circle Blog on Thursday, September 1st, 2011.
Note: We want to be sure that everyone knows that you DO NOT need to have a blog to participate in the challenges here on the Cricut Circle blog. When the InLinkz tool at the bottom of the Challenge Post asks you for the URL of your blog, you can also type in the URL of a gallery you have uploaded your project to, a direct URL to the image (Photobucket, TinyPic, etc.) or even a message board entry where you have inserted your photo. If you receive an error while submitting your entry, look at the top of the screen and there will be three tabs to choose from. One of them will give you the option to upload your image directly from your computer. We are really enjoying your submissions! Keep them coming!

August 3, 2011

Finally getting settled


Well, we are finally getting settled in the new house.  The major part of the move- furniture, took place last Saturday.  At this point I am down to just a few boxes left to unpack & I need to pick up a few little things from the old house.  It is my hope that in the next two weeks we will be fully settled in to the new place.

So, this morning I took a few minutes out of the unpacking schedule to work on a project.  This one is for the kitchen.  I absolutely love the new cricut cartridge, Love you a Latte!  When I saw it last month I knew that I had to have it for some new house projects.  Today, I created the "have a cup" cut using vinyl purchased from H & H sign supply, the love you a latte cartridge, my cricut expression, and my gypsy.


Supplies to get the project started.  4 colors of vinyl, gypsy, love you a latte cartridge, and a 12 x 24 E mat


At this point the first two cuts have been layered and the two layers of the coffee cut are ready and words have been weeded


The cup has been added


Adding the words using transfer tape


Layering finished, ready to apply to the wall


Before


After