July 23, 2013

My boys


I made this quick and easy scrapbook page this morning using art glitter products and a digital scrap oil kit that I purchased on etsy.  The layout was made using leftover pieces for an upcoming project on the art glitter blog so be sure to check back for the companion project on August 17th :)


July 21, 2013

Glitter tattoos

I created these glitter tattoos for the 4th of July using art glitter glitter and body adhesive.  To make the stencils I used my cameo and outdoor vinyl


Back to basics in blogging


I have been thinking long and hard about my blogging and I have finally decided on what direction I would like to take.  When I began blogging a few years ago my original mission was to have a way to share and achive the projects I have made.  Over time my blog gained followers and I was thrilled. In fact I am always surprised and thrilled when people take the time to stop by leave comments and share my work.  But somewhere all g the way blogging became stressful rather than fun.  I felt like I needed to constantly created something g bigger and better and write detailed posted.  This stress has kept me from posting a lot of my simpler projects, but that defeats the purpose of archiving my work.  So I have decided it is time to go get back to basics.  While I do plan to continue sharing my more elaborate work I am also going to be posting some of my simpler projects.  This may mean at times that I choose to just share the photos and a few quick details.  It also means that I will. E posting more frequently.  


So I'm starting now. The following photos are of car decals I made today for a friend.  They were made using my cameo and glossy outdoor vinyl

The first is a starwars hello kitty and the second is for some game.   It is for a friend so I'm not familiar with the game but I know he is happy :)

July 15, 2013

Maple Manor from SVGcuts.com

For those of you who use SVG files, I want to share a great one with you.  This is part of the Maple Manor SVG kit from SVGcuts.com.  They have a great how to video on the site that is a very useful tool for the actual assembly process.  you can find the KIT AND INSTRUCTIONAL VIDEO by clicking on this link. 


As this is my crafting journal of sorts (not that I update it often these days)  I wanted to share some photos of my finished project.  Most of the papers used in the creation of this project are from Close to my Heart.  If you are intersted in seeing more of the papers that CTMH has to offer please visit my site.  I used White CS, Crystal Blue CS, sweet leaf CS,  and some assorted CTMH papers for the flowers.  I also used Crystal Blue ink for inking up the edges.    I also used some glitter CS from my stash that I picked up at Joann (but I don't know the brand).  All of the flowers and leaves were cut using my cricut and the Close to my Heart Art Philosophy cartridge.  The small pots were cut using my Cameo and a 3D flower pot from the Cameo online store. 

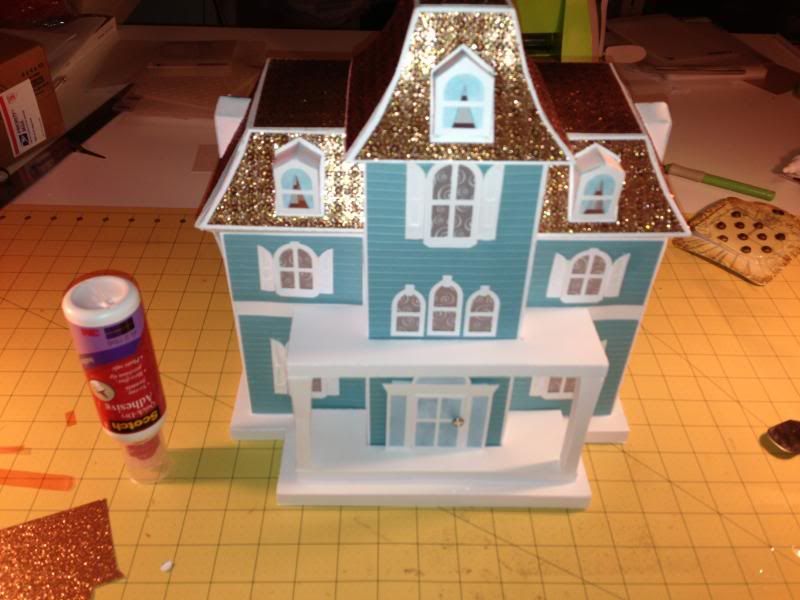
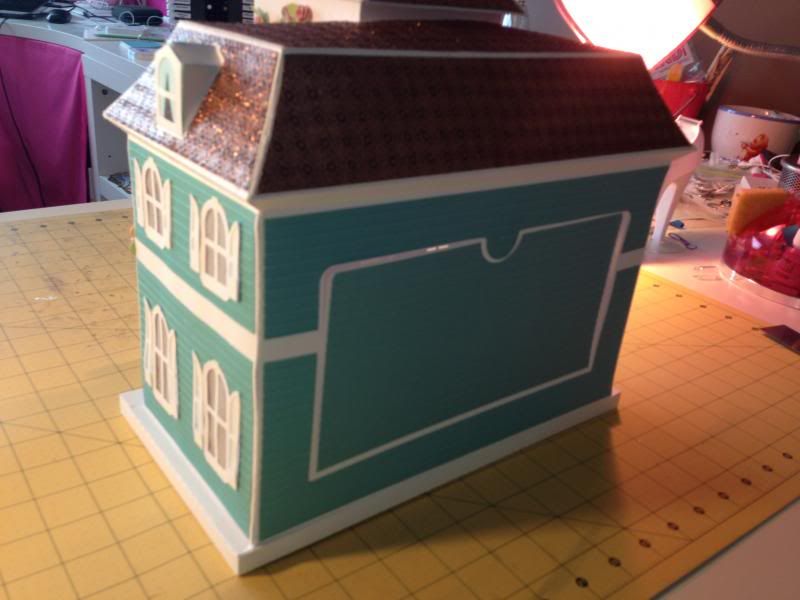
Here is my assembled house before I added any additional decor. 

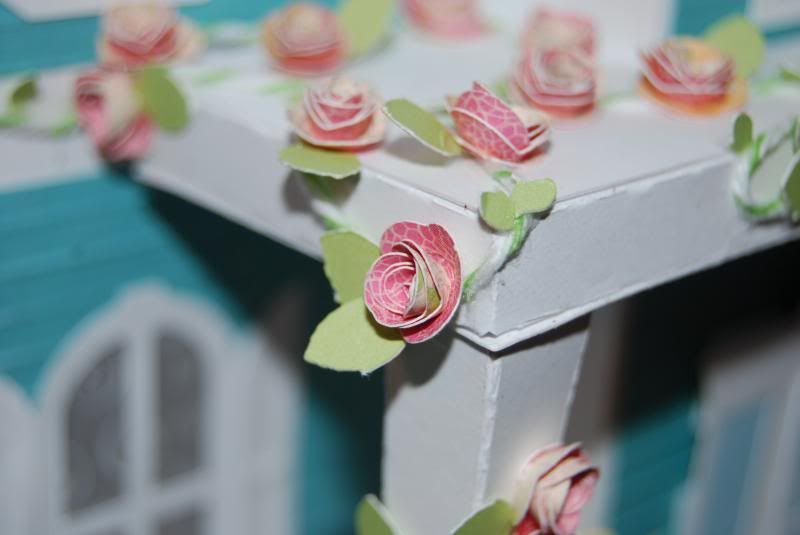
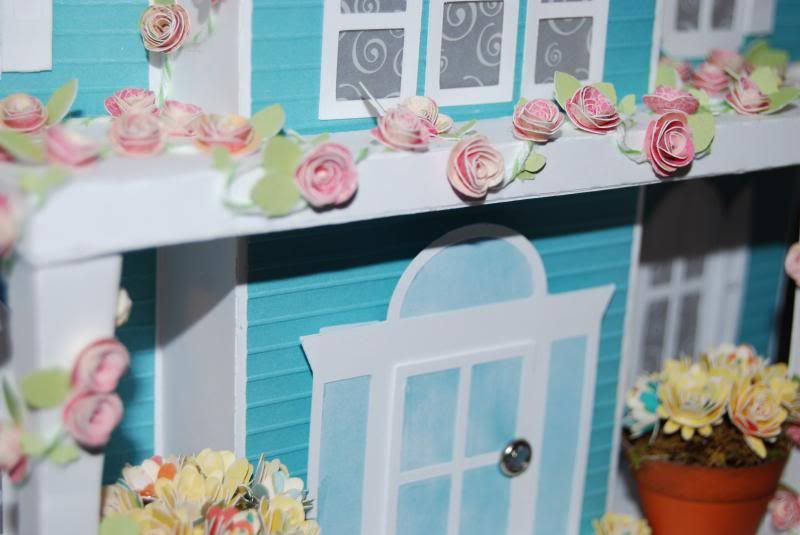
Step one- add an ungodly amount of bakers twine to the porch and up the front of the house.  Then add about 80 tiny roses.  These were cut at 1 inch, so they are quite small after they are quilled up. 

Step two- add leaves to the flowers.  I used two sizes they were cute at 1/4 inch and 1/2 inch.  I believe there are about 100 or so on here.

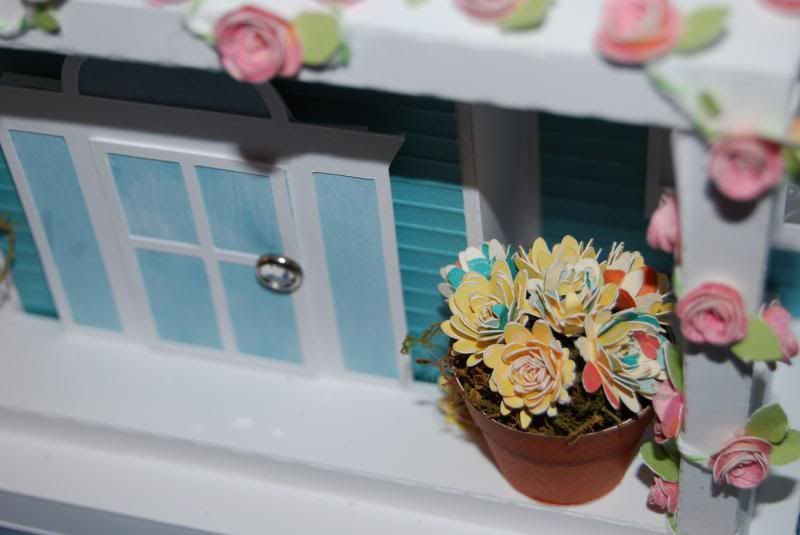
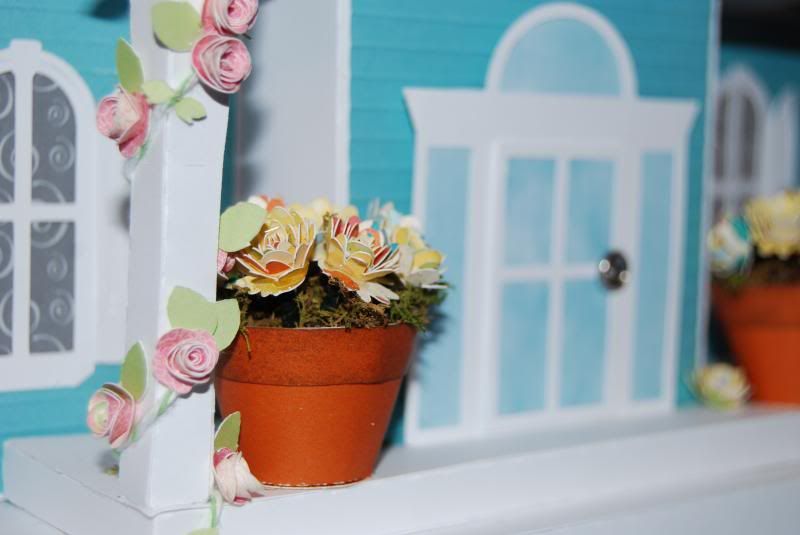
Step 3- make some teeny tiny pots.  these are about 1 inch high (tera cotta color CTMH paper- inked with chocolate CTMH ink).  Add a small amount of foam and moss to the pots.

Step 4- Make more TINY flowers for the pots.  These were cut at 1.5 inches, glued to toothpicks, and put into the pots. 

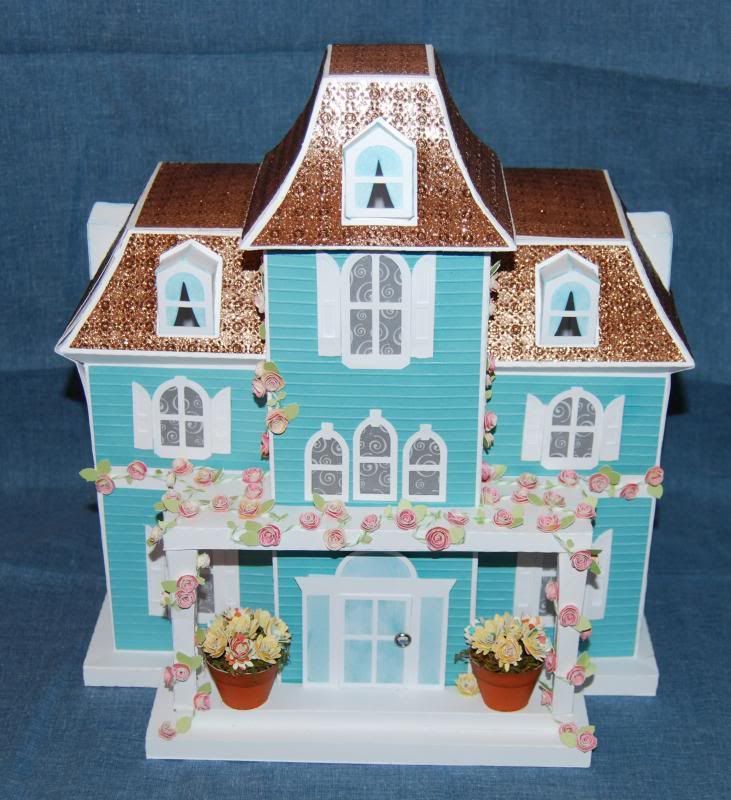
Thats about it, for the process...now to share a few detail shots and the finished product!  thanks for stopping by!

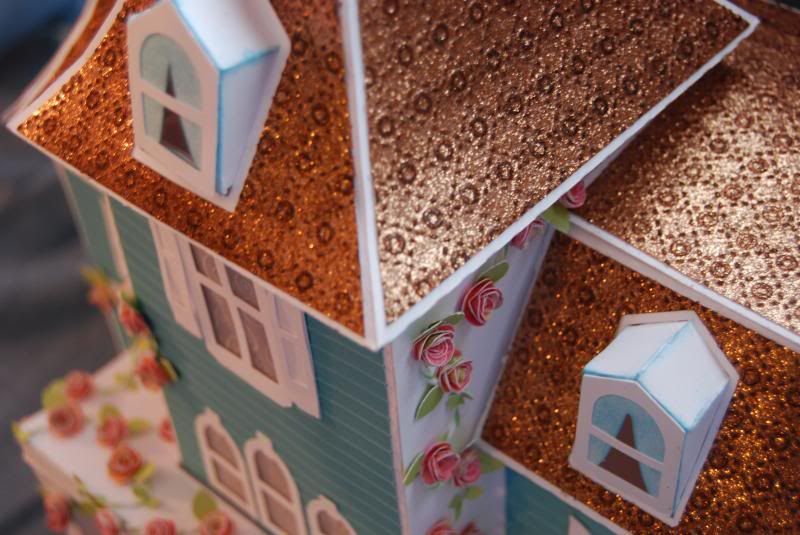
Embossed glitter paper inked with brown stazon ink - doesn't it look like a copper roof?  Oh and incase you missed it I also embossed the siding on the entire house.

Oh so tiny roses and leaves.

Flower pot with TINY flowers.

The front porch.

 
 The back side of the house.


The finished project! 


July 2, 2013

Preview for Art Glitter - 4th of July layout

Be sure to stop by the Art glitter blot today to see this 4th of July themed project I created as part of the Art Glitter Design team.  Art Glitter has teamed up with Authentique Papers this month to offer a special promotion, so be sure to stop by for details.