October 31, 2010

Happy halloween

Boy has this week been busy.  My boys had a halloween party at school Friday, and we had trick or treat today.  I haven't had time for a lot of crafting this week, but I did manage to squeeze in a quick halloween project for the boys.

Today I made their trick or treat bags using heat transfer vinyl.  I used the Pumpkin Carving cartridge for the haunted house image, and Opposites attract for the names.  It was fairly strait forward.  The haunted house images were cut at 5 inches, and the names at 3 inches.  They are fairly small bags as my boys are only 2 & 3, but they loved their treat sacks.  I also added a bit of ribbon around the top with some no-sew fabric glue.

I have a few photos of the HTV process in my camera that I will add later.

I began with my gypsy.  I used an image from Pumpkin Carving, and mirror imaged it on my gypsy.  I also added the boys names and mirror imaged them.  The images were all cut using my expression, 3 for speed, 3 for pressure, and a blade depth of 3.  You need to be careful when cutting vinyl.  You want to cut thru the vinyl, but leave the backing sheet in tact.  This can take some practice, but once you get the right settings it will become easy.

 The final step before transfer to to weed out the negative of the image.  I love the tool included in the cricut tool kit for this.  Be sure to leave what you want to transfer on the backing sheet.  Once the image has been weeded apply it to your fabric using the hottest setting on your iron (no steam).  See finished project above

October 27, 2010

Sweet

Just a simple page layout made for my little guy's album.  I used sweet treats for the ice cream cone gypsy font for the word, my cuttle bug to emboss the blue paper, some stickles for the glitter,a simple border punch down the side of the accent papers,  and some pretty paper to pull it all together.

October 26, 2010

Taking the day off

Today is my husband's birthday and I have promissed him a blog free day (or no new projects for the blog).  So, be sure to check in tomorrow.  In the mean time be sure to check out all of the projects that have previously been posted here.

October 25, 2010

Just one project today.

So, I am looking at the clock thinking there is no time to complete a project tonight.  I thought I would share one that I did a while ago- just to give you something pretty to look at!

This project was completed for the Cricut Circle Swarm in SLC- OCT 2010.  I did the vinyl work and the layout and Jan Schmeckpeper did the map.  These items were created for a door decorating contest during the course of the swarm.  I used my GYPSY to create the layout to be cut in vinyl.  I believe I used ZooBaloo, and ELEGANT CAKES for the cuts, but I will need to double check that in my G this week. 

October 24, 2010

Think Pink Project for hooscrafty.com

The gals over at Hoo's Crafty are sponsoring a wonderful challenge this week.  They are asking people to come up with a project that will help inspire monthly breast- self exams.  I worked on creating a project for the challenge and here it is.

I altered my calendar to reflect the think pink mentality.  I covered the book, added ribbon, buttons, bling, and charms. 

Here is the final product...then I will break down a few steps.

So I started by covering the calendar a pink stripped paper.  This was the original book
I cut Believe, the ribbon, and the butterfly using the PINK JOURNEY cartridge and my imagine.  I choose several colors of pink in the RGB screen and flood filled the images.  They were printed and cut on shrinky-dink film.  Then shrunk using my heat gun.  This was my first experience with the shrink film and I goofed the first set.  I didn't have my blade set deep enough and then the film slipped.  I was able to salvage butterfly and ribbon but had to toss the courage.  I then printed the believe on what was left of the shrink film then cut that our with a spellbinders die and my cuttle bug.


Next I cut out the word courage out of glitter cardstock using my expression machine.  Added a wide ribbon and some buttons and bling at the bottom of the front cover and made a ribbon out of satin ribbon. 


I attached the shrinky dink charms to ribbon and added some ribbon to the binding of the calendar.  I made sure to leave the ribbons on the charms long enough to use them as page markers.


Added a bit more bling


And last but not least I added a pink button to the 15th of every month to remind me to do a self exam


Ian's birthday cake

My son Ian turned 2 in June.  We had a very small family party at Chuck-E-Cheese, but I wanted to make something special for him.  I used the Cricut Cake to create his birthday cake.  I have a tiny little 6 inch cake pan that is perfect for these things.  I believe the ELMO was cut at 4 inches.  I used Wilton Fondunt and colored it myself to get the right colors.  I think he turned out nicely.  We have a family member who can not eat chocolate, so I ended up making cupcakes and the cake to give options.  I used the Sesame Street Cricut Cartridge on the cupcake toppers, using my Cricut Expression & used the same cuts in my Cricut Cake.  I also made a coordinating card for his birthday.  Hope you enjoy.


Cricut cake mini

As I am sure many of you know, ProvoCraft is working on the cricut cake mini. At this point I have no idea when it will be released, but I wanted to share the youtube video with all of you. I have the original red cricut cake, and really like what the machine can do. I fully admit that I have not used it to it's full potential. I am hoping the release of this new product will give me the inspiration I need to get moving with this machine. I do have a few projects I have completed that I will be sharing with all of you soon!

October 23, 2010

8th anniversary

Today is my 8th wedding anniversary.  I ordered my husband's gift a while ago, but it still hasn't arrived.  As it is a combo birthday/ anniversary gift I am hoping that it will arrive in time for his birthday on the 26th.  I did however, make him a card that I thought I would share with all of you.

The card base is 6.5 inches by 4.5 inches.  There really isn't a good reason for choosing that size, but it was just how much I had of the base color- trying to use a scrap...LOL

The frog was cut from create-a- critter at 2.5 inches, and the "happy anniversary" is from elegant cakes.  I trimmed the a to make it look like hoppy instead of happy.  I'm not sure what the height of the phrase was, but I'll look for that detail in my Gypsy later.

I embossed the card base in my cuttle bug (swiss dots), sanded lightly than ran it back through the CB to flatten the dots.  I really love this effect and it makes gluing much easier.  The frog was also embossed with "spots and dots" and then lightly sanded.  The border was punched using a Martha Stewart punch.  And of course I had to add some bling to the crown.

For the inside I printed a note from my computer on regular white paper and attached it. 


October 22, 2010

Time for another wedding project

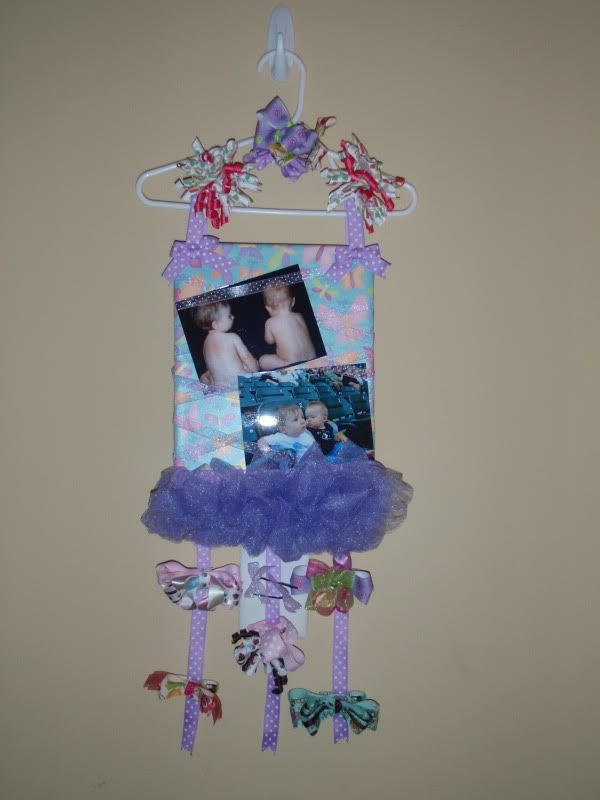
I love my Cricut and all it can do.  This includes some NO NO program usage.  I will always use my cartridges and continue to buy more, but I also like that there are other programs available ( MTC and SCAL) that allow you to create items you would never be able to find in an off the shelf cartridge.  I personally have not used MTC, but I do own SCAL- sure cuts a lot.  Computer programs are pretty easy for me to figure out, but if you are not great at working with a computer this program can be a bit difficult.  However, I believe it is truely worth the price- even if you only use it for fonts.  MORE ABOUT SCAL LATER.

So, for the wedding last weekend I used a stock clip art image, and altered it for the invitations, place settings, rsvp cards and other paper items.  I did not do the actual designing of the invitations just the image work.  I used that same image, manipulated it in SCAL and used it to cut vinyl for the center pieces.  So, here are a few pictures of the process.


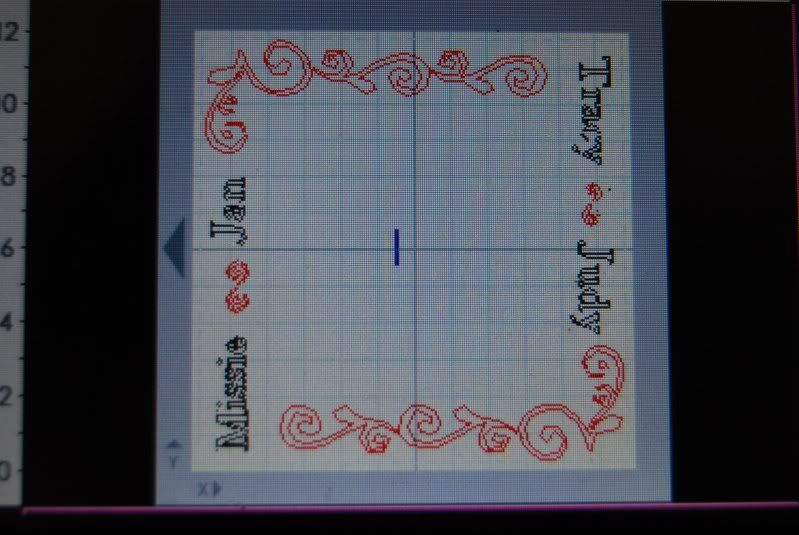
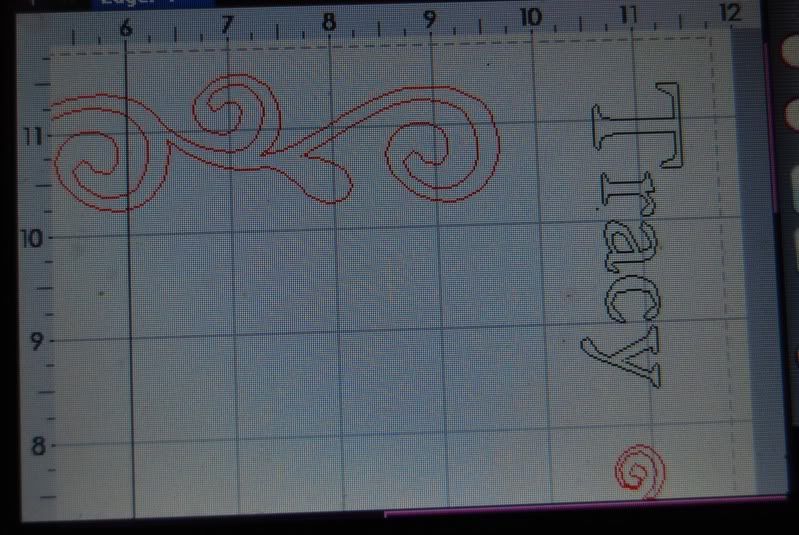
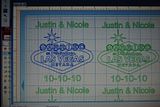
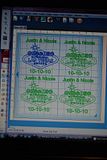
I know this picture isn't great as I took a photo of my computer screen, but I think you can get the idea here.  Scal looks a bit like design studio, but will allow you to work with your own images.  So, here you can see items to be cut laid out on the mat.


                                           DSC_0037-1.jpg image by missieacafa

                                 
                                                        DSC_0038.jpg image by missieacafa

This is the vinyl after it has been cut and weeded.  I cut each sheet down into individual images after I applied the transfer tape.


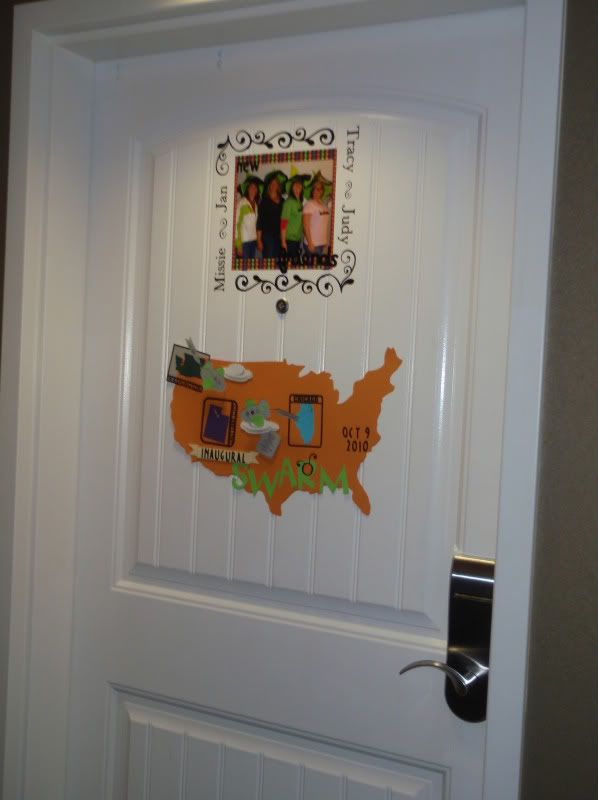
This image is on the center piece...I know it isn't easy to see in the picture, but it was cut from vinyl and applied to the flower vases...and just a bit of bling was added to the star.


The same image on the place setting cards


 The center pieces with the table cards.

October 19, 2010

More hair bows.


As I have gotten so many comments on the KORKER bow posted earlier this week I thought I would post a few more hair bows that I did this summer.  These were all created for a little girls birthday, including a memoboard with ribbon holder attached.  The original idea for the tutu memo board came from greenbean's blog Greenbean's crafterole  but I then adapted it to suit my needs for this project. 

If you guys are interested I will work on putting together some tutorials for the different types of bows, but you will hav to let me know which ones you want to see ;)

P8120699.jpg
P8120732.jpg

P8120704.jpg
P8120705.jpg
P8120707.jpg
P8120709.jpg
P8120715.jpg
P8120719.jpg
P8120722.jpg
P8120724.jpg
P8120726.jpg
P8120728.jpg

wedding favors

I helped create table favors for the wedding I photographed this past weekend, and thought I might share them here.  The photos were from the engagement session, and the rest I created in photoshop.  Enjoy.


October 18, 2010

another wedding photo

It has been a very busy weekend

This weeked was crazy busy!  Spent all day Saturday photographing a wedding.  I had been so nervous about the endevour.  I am not by any stretch a professional photographer.  I am more of a hobbiest.  I love taking pictures, but can't imagine a world where anyone would pay me to do it (it would be like being paid to scrapbook- too good to be true).  Anyway, a few months ago a friend of the family approached me about doing photos for his wedding.  The bride and groom are both pretty young and didn't have a ton of money to pay a professional photographer.  They asked if I would do it for a lesser fee.  I thought long and hard about this before agreeing.  In the end, I agreed to do the photos but told them I was uncomfortable taking any payment.  This was a good learning experience for me, so I feel that we all gained something from the experience. 

So, over the next few days I will be posting some photos from the wedding.  I will also be posting a few projects I helped with to make this wedding a success.  I have been friends with the grooms aunt for years- and she hosted the reception.  I helped with a few things for the party and will be showing those as well.

A very busy weekend

This weekend was so wonderful!  I was luck enough to be asked to photograph a wedding.  I feel very blessed to have so many people in my life who enjoy my hobbies, photography being one of them.  Over the next few days I will be posting some photos from the wedding along with some of the projects I assisted with along the way.  Hope you enjoy.

October 15, 2010

A big thanks to the gals over at hooscrafty.com

http://www.hooscrafty.com/


Dawn         JINGER        Liza            Rina

So, I think today I need to do a shout out to the gals over at hooscrafty.com  I have been very fortunate to have met these awesome gals at CHA 2010 in Chicago.  This past weekend at the Cricut Circle Swarm in SLC I got to spend some quality time with these ladies.  Not only are they super talented crafters, they are also genuinely nice women!  I feel so blessed to have gotten to spend time with them. 

Oh, and of course I have to give them a hard time for linking you all to my measly little blog.  It was my intention to get this up and running before I had any followers, but today I logged on to find that I have 9 followers!  Wow!  All I can say is thanks for stopping by, and for giving me the kick in the pants I need to start posting! 

October 3, 2010

Day 3

It is a little after 10 pm and I am finally getting around to posting here.  Today has been a day all about my boys.  We went to Chuck E Cheese, the grocery store, lunch, the park, played with trains, and watched countless ours of kid friendly tv.  I am exhausted!  However, I did find time to finish up my calling card for the Cricut Circle Swarm in Utah this week.  I have been working nonstop since the boys went to bed, and they are nearly done.  I have a bit of bling to add to the last few, but more than 50% are complete.  I also finished the tags for the tag swap which I will post tomorrow.  Have a wonderful evening and check back soon!