March 29, 2011

How do you use make and takes?

A couple of weeks ago I attended the Cricut Circle Stampede in Dallas, TX.  During the event several make and take stations were set up for us by some of the sponsoring companies.  I don't know about you, but I love make and takes.  I love to try new products, techniques, and designs I would not have done on my own.  The problem is, I tend to just throw them in a drawer never to be seen again.  Well, I am determined to do something different this time.  I am going to attempt to find ways to use all of the Make & Takes from Dallas. 

Here is the Sample project for the first Make and Take.


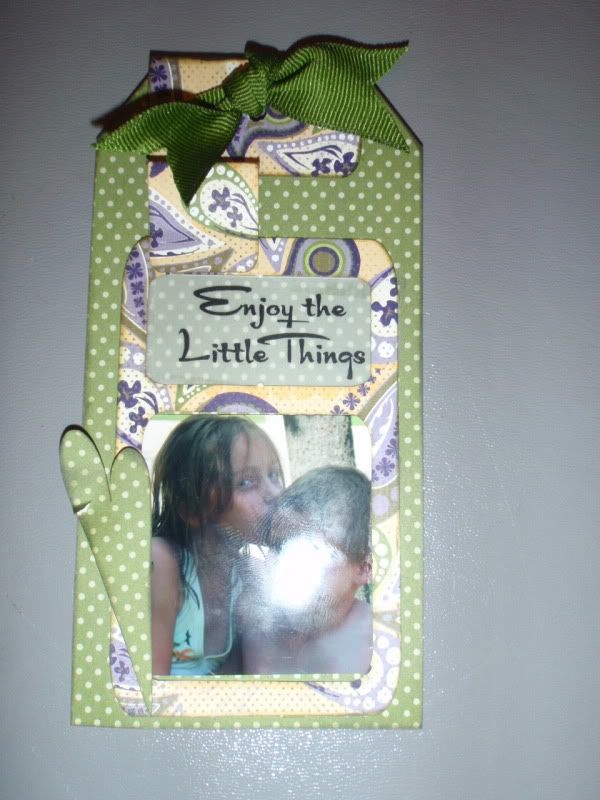
I didn't have any idea where to start with this one.  They gave us the cuts, and that was all.  While the tag is very pretty, it isn't a color scheme I would normally use- of course that is part of the Challenge...to do something outside my comfort zone.  I choose to incorporate the tag into a scraplayout.  Let me know what you think.

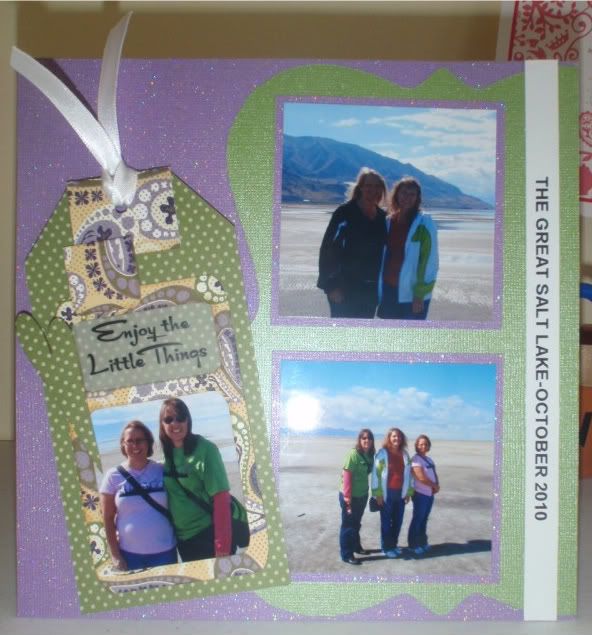
I started with the tag, added a photo of Jan and I from our excursion to the great Salt Lake in October.  I cut a cute frame using my Shall we dance cricut cartridge in green the layered the other photos (with Tracy and Judy) with 1.8 inch mats.  I wanted to pull in the white from the ribbon so I grabbed my label maker and printed up some quick text on white to add a small amount of labeling to the page.  While the page is quite simple it did help me accomplish two goals.  I got one layout completed from my Utah trip and I used on of the make and takes from my Dallas trip!


A quick and simple birthday card

My family and I attend a birthday party this weekend for a family member who just turned 2!  I whipped up this quick birthday card for him as his theme was animals, and what little boys isn't a monkey!


The card was created to fit in a standard A-2 size envelope- that I already had on hand.  I used my Gypsy to create the card base 10 inches long (to be folded in half to make the height 5 inches) by 4.5 inches.  The actual rectangle is 10" by 4" and I welded a monkey to it to create the small bump outs for the ear and tail making the card 10.25 inches by 4.5 inches and when folded 5.25 inches by 4.5 inches.

The monkey is from Create a Critter sized to 5 inches, and the vine is the same. 


Inside the card I cut happy birthday from Create a critter, and made the little monkey with Gypsy font and some welding.  I cut the phrase from black vinyl instead of paper because it essentially makes a sticker that is perfect for little letters! 

I know it is a very simple card, but I do love the way it turned out!  I  hope you like it too.

 
                  Another card view                                                              Envelope

March 25, 2011

Birthday love

I have to say, I feel so lucky to have such wonderful friends.  My family has some what neglected the fact that today is my 30th birthday, but my friends have totally made up for that.  I want to share with you a few awesome gifts I got for my birthday this year.

First my friend and birthday buddy Janice over at The Craft Place Blog made this beautiful mini album for me.  She actually gave it to me about a week ago, but I have been saving it to post today.  She is just so wonderfully inspirational and I am so thankful she is my friend!  More photos of the album can be found on her blog.


My friend Jan over at The Crafty Mermaid also made some special crafting gifts for me.  She crafted this lovely springy decor for me to use as a table decoration at the Dallas stampede.  I love it!  I need to find a good home to display it in my craft room now!

Jan also made me this adorable CakeBox for me.  She was so sweet and filled the box with a punch as well as some beautiful twine- I can't wait to use it!  For more pictures of the projects Jan created please be sure to visit her blog!


March 23, 2011

Door Decor

Here are a few photos of our hotel room door decor.  We did win last place, a $15 credit to cricut.com, so I am excited about that. 


On either side of the door were wanted posters with each of our names and photos...I'll post better images of those a bit later!  Jan cut the Rowdy sign from Vinyl using rock princess for us!  I just love the way it turned out, and Princess brought the life size cowgirl!

Table Decor

While shopping to prepare for Dallas Jan and I found these awesome cowgirl themed items at Hobby Lobby.  We were lucky to find them in the clearance section, so we decided to get them for our roomies as well as ourselves.  I can't wait to find a place for them in my craft room so I will always have memories of Dallas handy.  We also found a wall sign to match which we used for door decor, and some frames that got left at home- that will soon house pictures from the trip.


Photobooth pictures

During the Cowboy Dinner on Saturday night, there was a photobooth set up to take silly photos.  They had all sorts of hats and things to used as props or you could just use what you had.  Here are some of the photos I was in.


March 22, 2011

Calling cards

These are the calling cards I made for the Swarm.  I used my Cricut Circle embossing folder (purchased in Utah), the cricut everyday cartridge for the circle logo, create a critter for the cow, and for the back side I scanned my membership certificate and did a little work on it in photoshop.  I hope you enjoy!

Dallas Swarm 2011

I feel so lucky to have had the opportunity to attend the Cricut Circle Swarm in Dallas, TX, this past weekend.  Over the next week or so I will be sharing photos from the weekend, projects I completed, and some of the goodies from the trip. 

This is a photo from our last night in Dallas from left to right it is me, Crystal Kovach, Jan Schmeckpeper, and Crystal Wessley.  This is also one of the first projects I started for the trip.  I designed and created t-shirts (with help from Jan) for all of the gals in our group.  I ordered the cute cow fabric on ebay months ago, and cut it using the Cricut Everyday cartridge, then added words using Heat Transfer Vinyl.  Below you will see a better close up of the shirt design.


March 15, 2011

Linda's Bags

My good friend Linda made me this awesome bag!  I am so excited!  She is a very talented circle gal who lives locally and we met up this morning so I could grab the bag from her.  Not only did she make one for me she made a few extras for me to take to Dallas this week incase any other circle gals would like to have one.  So, if you are interested send me a message and I will be sure to meet up with you.  I have a few large 13 x 13 ($50) bags, and just a couple of small 9 x 10 ($45) bags.


Some of the extra bags- if you would like a more detailed photo please let me know.