August 20, 2012

A gift bag and matching card

We recently attend a birthday party for a little girl who is turning 6.  I had a gift for her, but wanted to make it a little more special, so I made a tote bag an matching card to go along with the gift.  I used the bag as a reusable gift bag. 


The card was made using the Cricut Artise Cartridge available from Close to My Heart.  If you would like more information on how to purchase this cartridge please shoot me an email and I would be happy to help you createdbymissie@aol.com  As I had this amazing lost and found paper, I really didn't need to do much to embellish the card.  I simply added pink glitter to the crown and some ribbon and tulle.  I stamped the phrase on the inside.  This was such a quick and simple card.  I got a lot of ohhs and awws at the party and no one would know that it only took 25 minutes to create!


August 18, 2012

Paper Tea Cup to hold my stick pins

I just want to share a quick project that I made to help organize my craft room.  I recently participated in a stick pin swap with some of my friends from the Cricut Circle.  For each group you participated in you made 20 sets of pin, then sent them in for swapping.  At the end you recieved 20 sets of pin (one of your orginals and 19 created by other crafters).  I participated in two of the groups, and got back 40 sets of pins (2 or 3 per set).  They are all so unique and lovely.  The problem was, I had two gallon size bags full of these goodies and I really needed to get them organized. 

I cut this cute tea cup using a cut file from SVGcuts.com and then added the flowers vines that were cut using my cricut and the Artiste Cartridge.  I really loved the combination of the cricut and SVG cuts.  After assembing the cup and saucer I covered a styrofoam ball with some scrap fabric and then used it as a pin cusion.  I really love the end result. 


August 17, 2012

Gift card with matching box


Good Morning!  Today I want to share a quick card and box made using the Cricut Artiste Cartridge.  The card was made using the card on page 55 of the handbook (card) and cut at 5.25 inches (fit to page on the E).  I used paper from CTMH (ROXIE).  the flowers were also made from the new Artiste Cartridge page 54 (accent 2).  I made the stick pins a few weeks ago for a swap and really loved they way that they finished off this project.  The bow was Also from the Artiste cart and cut at 1.5 inches--- just fold on the score lines and secure in the center with a brad! 

As I needed a box that perfectly fit this card, I made it by hand, using my MS scoreboard.  To do this I simply measured the dimensions of the card and added two inches to the width, and two inches to the height.  I then used the score board to score along the edges and trimmed out the unwanted sections...  For the lid I used the same process, but added only one inch to each measurement.  If you aren't sure how to make a box on your own I have made a little instruction sheet for you.


If you do not have the Artiste Cartridge and would like to purchase this cartridge you can do so by shopping at closetomyheart.com/melissatodd


August 11, 2012

Sparkle girl!

I can not even begin to tell you how excited I am to share some news today!  As I have shared with you I had the pleasure of meeting Connie of Connie Crystal along with some of her team at CHA in Chicago this summer.  It was a pleasure to meet Connie and her design team leader Kristi!  In the weeks since CHA I have been in touch with Kristi and she as officially asked me to join the Connie Crystal Design team.  So, beginning in September I will be designing for Connie Crystal and making a regular appearance on their blog on the 1st and 3rd Friday of every month (dates subject to change). 


Visit the CC Sparkle blog to see the great projects using Connie Crystal, see my official bio (and the above photo), and be sure to bookmark while you are there.   Then be sure to visit me over at the CC Sparkle blog to see my projects and leave me some love and encouragement!


August 9, 2012

Donation box

Just a quick and easy project tonight.  I was asked to make a donation box for a group in my community called Pingree Grove Cares.  It is really an amazing group that is focused on volunteer work in our small town and making sure that our community supports each other.  They host all sorts of events including a fall coat drive, summer school supply treasure hunt, arrange meals for those who need them, and so many other things.  Recently a little boy in our town was hit by a car and badly injured.  The group is taking cash donations to help support the family in this very difficult time.  I was asked to make the donation box that was used during national night out this week and wanted to share it with you. 

It is really a very simple project, but it turned out quite nicely.  I started with a simple recycled shipping box and covered it with scrapbook paper=-  I choose a bright neutral pattern that stands out, but can be used for many occasions.  I cut eh words donation (top) and Pingree Grove Cares (sides) from glossy outdoor vinyl and attached them to the box.  The print layer was done on my computer using custom margins in my word program to get the exact proportions I needed.  I then matted the text on black cardstock.  I used some repossitionable adhesive to hold the matted font layer to the front of the box making it completely removable so that the box can be reused.  To finish it off I added a quick bow out of tulle. 


August 7, 2012

paper chandelier


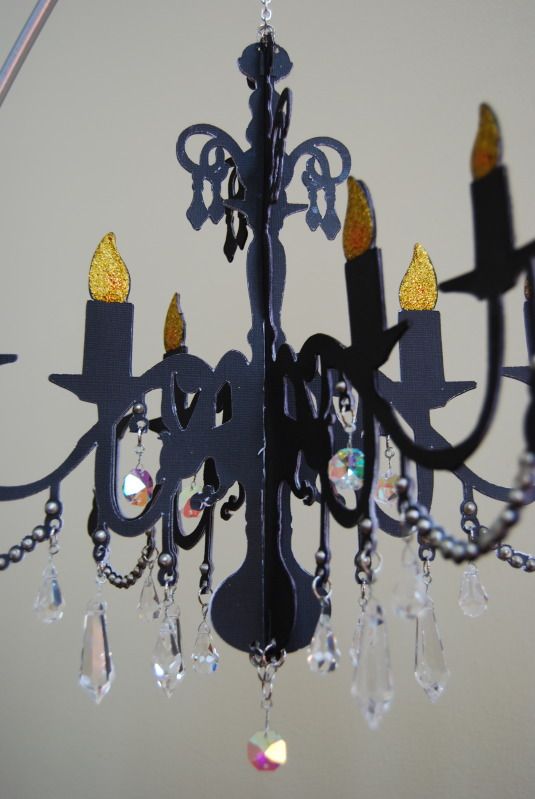
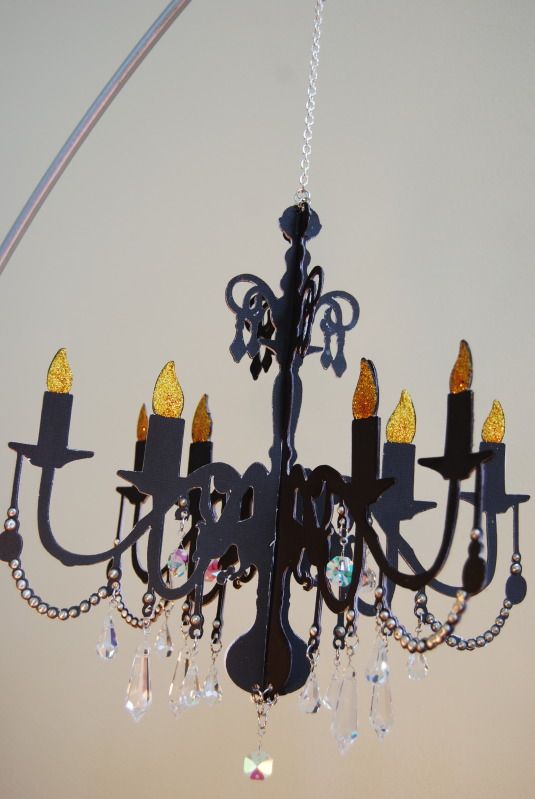
For the longest time I have been wanting to make this chandelier from the Summer in Paris Cricut Cartridge.  I just couldn't find quite the right embellishments to make it shine in the way I wanted it too.  Then a few weeks ago at CHA in Chicago I was introduced to Connie Crystal and it hit me- this was exactly what I need to make the project sparkle.  So this week I got to work creating this fun paper chandelier.  I want to use it as part of my Halloween decor, but I can really see so many uses for it (cute photo prop, princess party, craft room decor).  So, don't be surprised if you see it in the background of my future photos! 


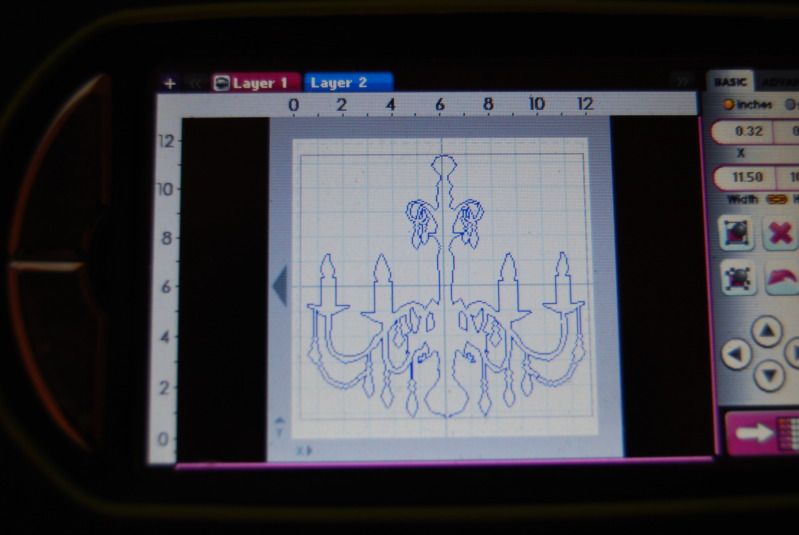
To get started I set up the cuts on my gypsy so that they were as large as possible on a 12 x 12 mat.  If you don't have a gypsy you could easily just use the fit to page feature.  There are really only two pieces needed, but because I wanted it to support the weight of the crystals I cut 4 of each piece then glued them together using Scott's Quick Dry Glue. 


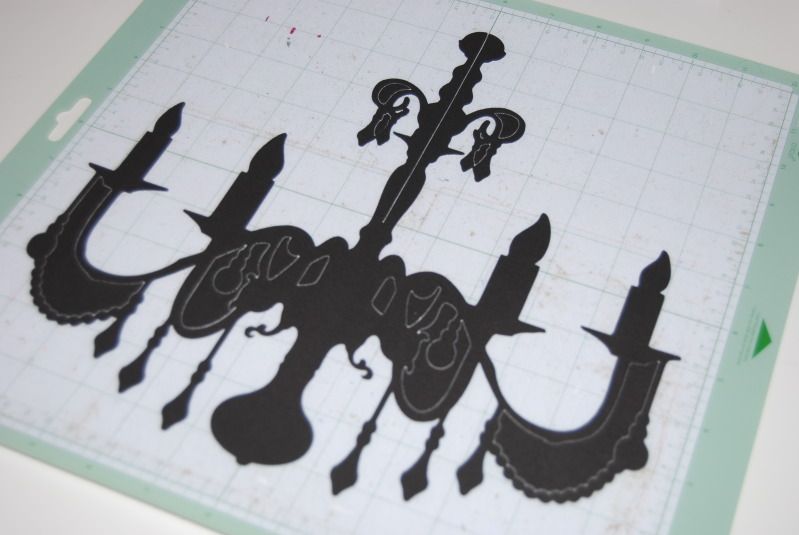
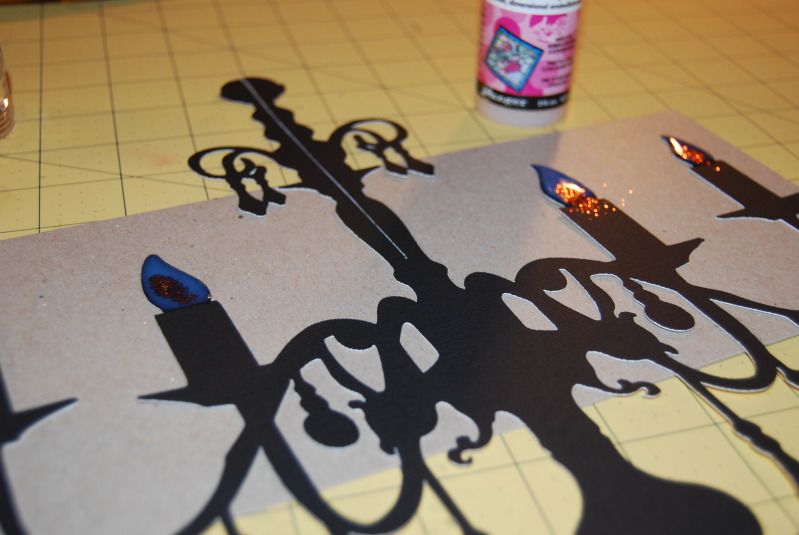
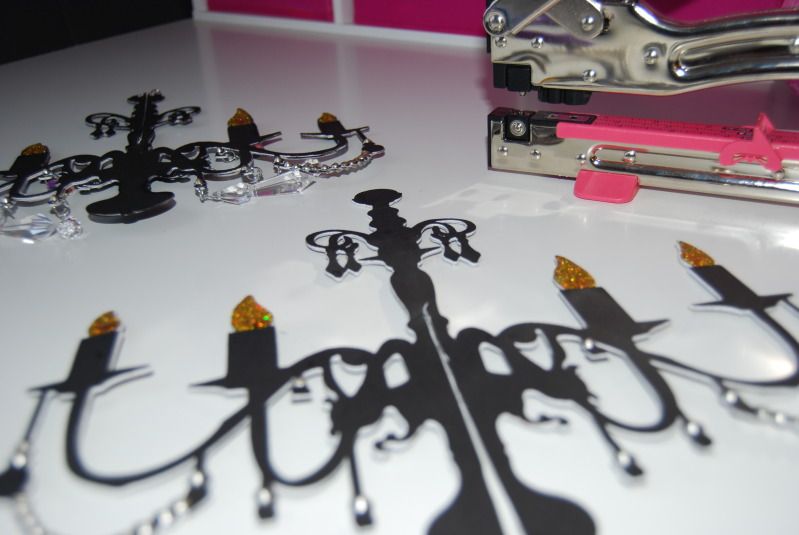
Here is the cut on the mat.  As you can see it is pretty detailed, so you really need a sticky mat, and a good blade in your cricut machine.


Add caption

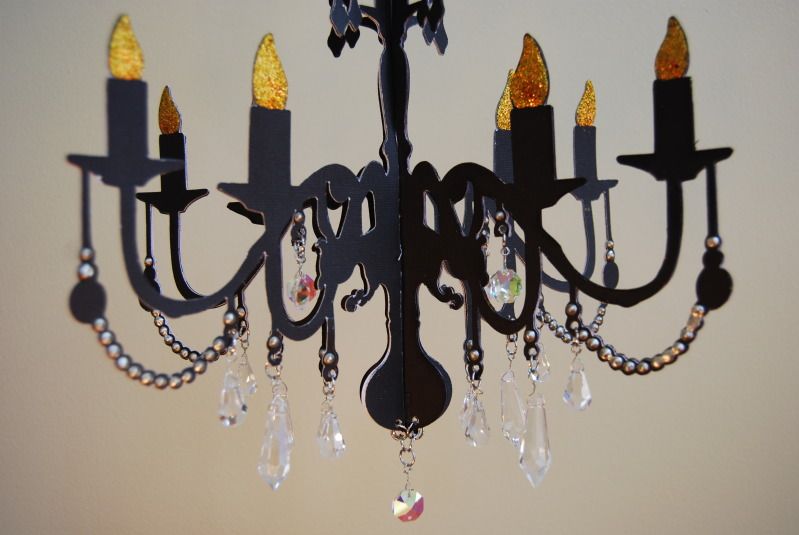
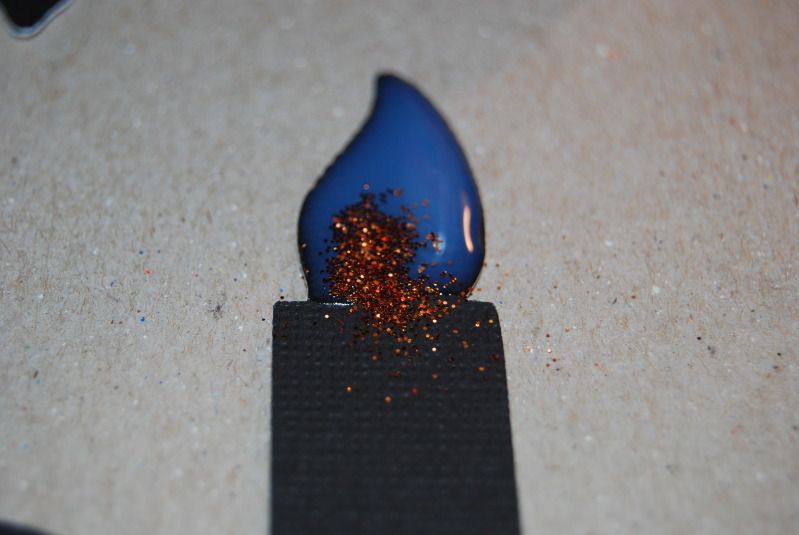
Before gluing the layers together I embellished the cuts- as it is dimensional be sure to embellish a front and back piece for each cut (so 4 of the cuts need glitter, and pearl accents). I started by adding glossy accents to the candle flames, adding orange glitter in the centers then gold to the outside.  The flames look like they are dancing in the light with the multicolored glitter.


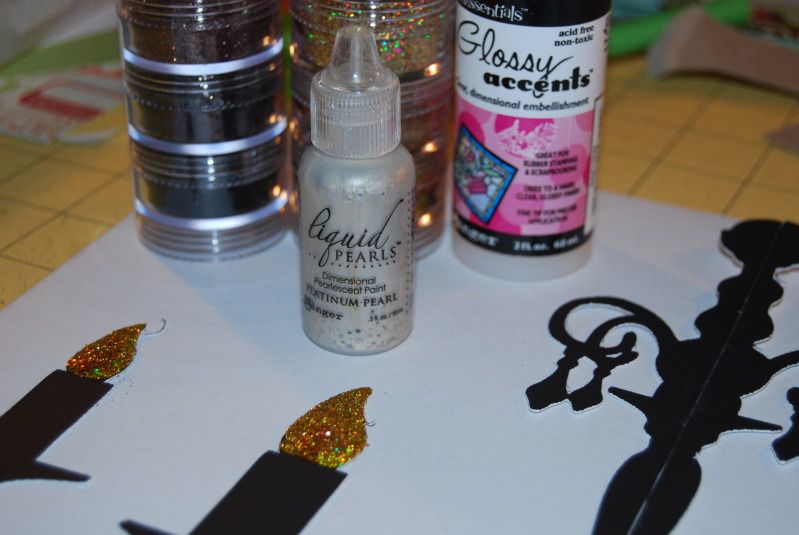
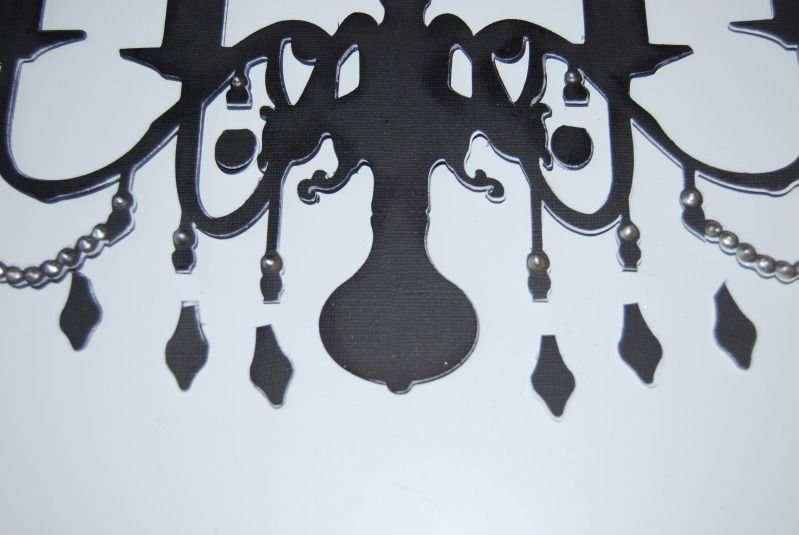
I then added drops of liquid pearls to the cut to give a beaded appearance.  I thought about adding real beads but decided not to due to the weight it would add.  I wanted to be sure the cuts could properly support the crystal accents.


Very carefully I removed the paper from the ends of the cuts using my microtip scissors in the areas where I would be adding the crystals. 


Then used my bigbite to add holes and hung the crystals with wire and jump rings. 


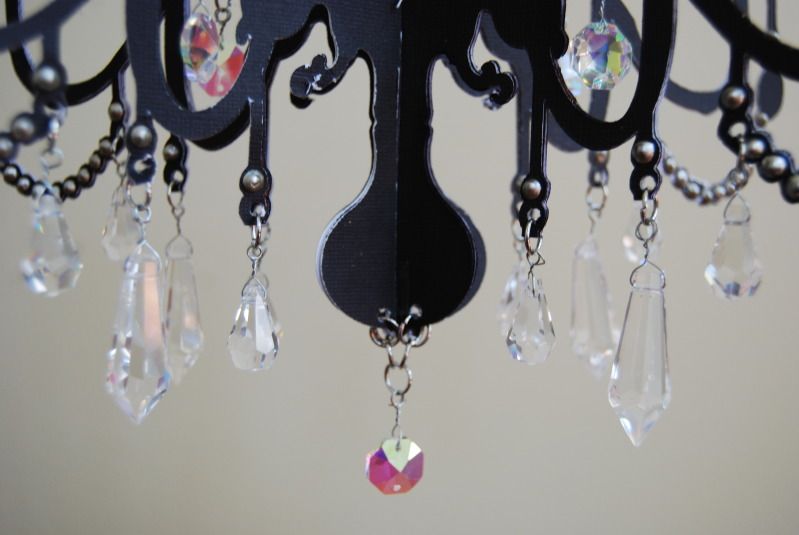
The sparkle is amazing in the light.  The crystals add just the right amount of bling without being too over the top!  I'm so excited to add this to my craft room!