April 20, 2011

Happy Birthday Cricut!


As many of you know there is a contest currently underway by ProvoCraft to help celebrate the 5th anniversary of Cricut and the launch of the new E2 machine.  The machine will debut next week on HSN.  Here is the basic run down of the contest:
Create a 12x12 layout with a birthday theme
You can use any cricut Cartridge in the layout.
Create up to three layouts

I had originally planned to wait until Friday (due date) to share, but as just about everyone who is participating should have their packages in the mail by now, I am going to share tonight.

Layout #1
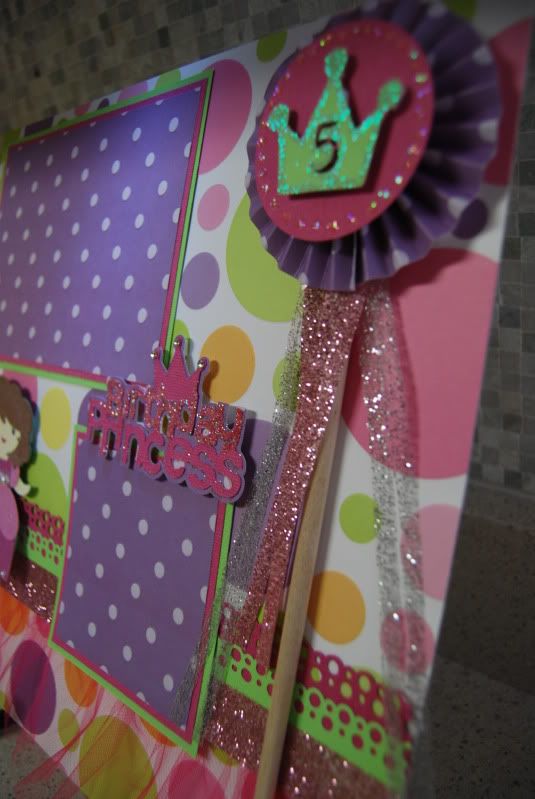
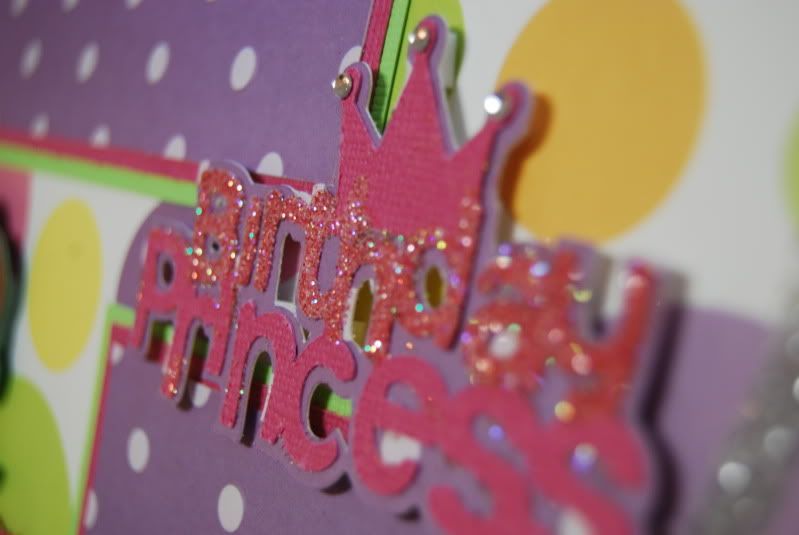
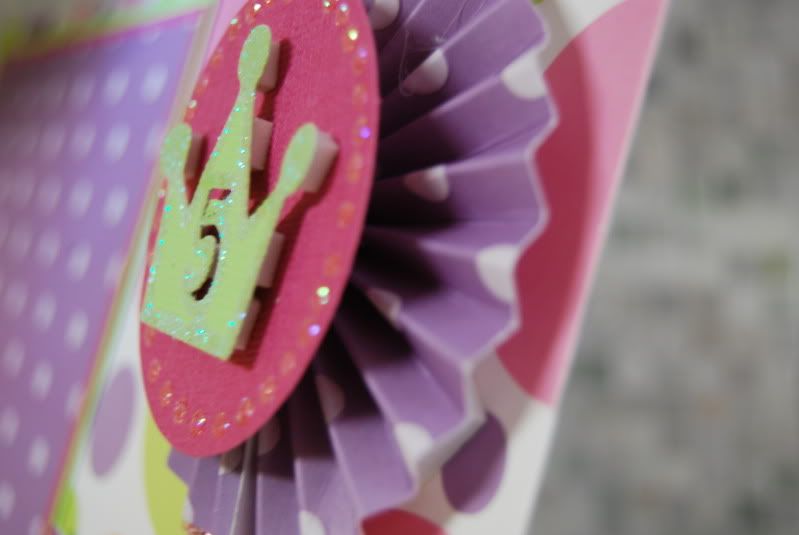
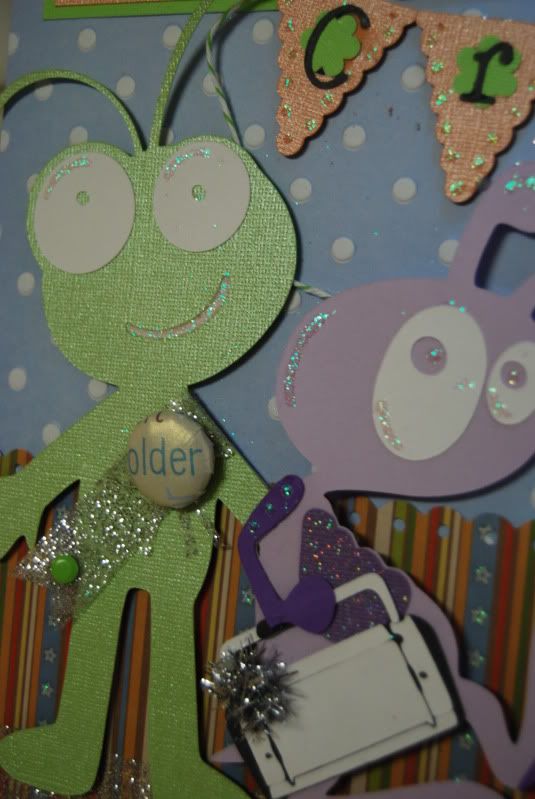
For this layout I went with a birthday princess theme.  As you all know, I have two little boys.  I don't get the opportunity to do much girly scrapping so I decided that since I am not keeping the layout this would be a great opportunity to use some girly cuts and carts. 

I used Birthday Cakes and Once Upon a Princess for this layout.


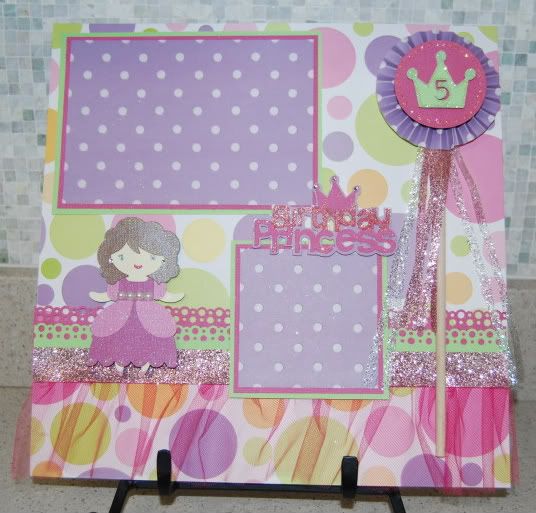
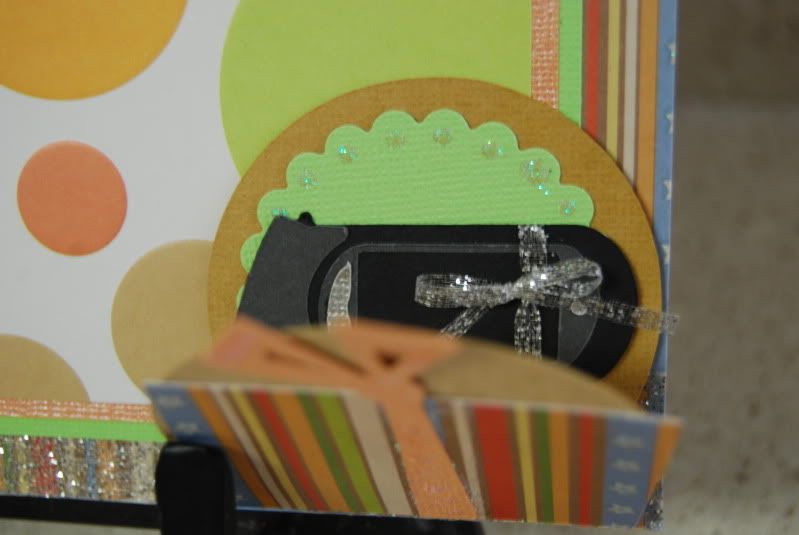
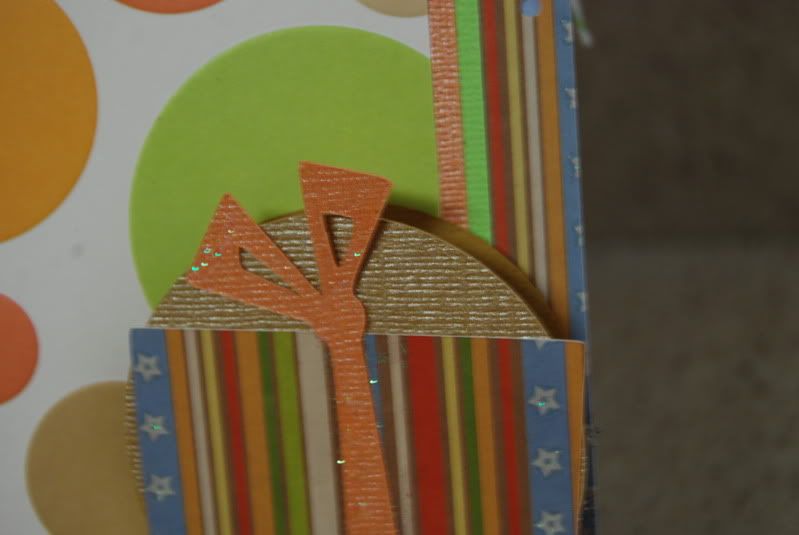
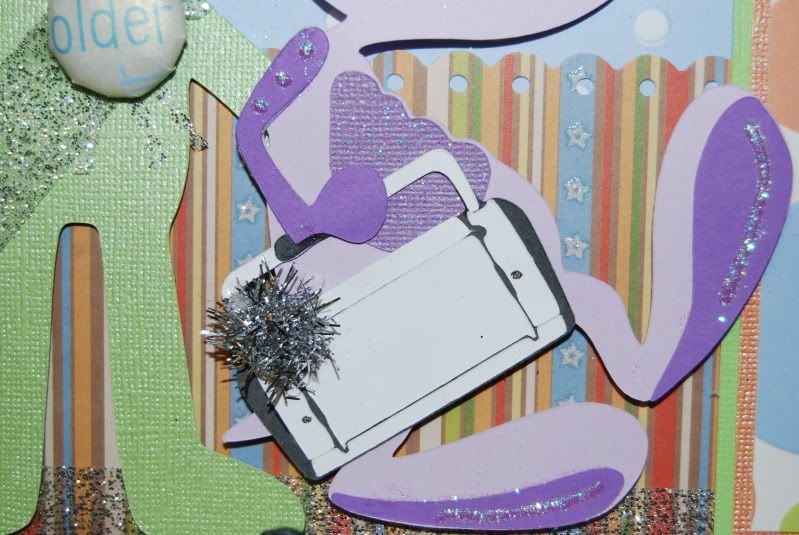
I made the wand using my Martha Steward scoreboard and accordian folding.  I cut the crown with the number 5 in it- this is the 5th anniversary of PC.  I also added a tulle skirt skirt to the bottom of the page, lots of glitter, bling, and ribbon.  I also added a princess to the page.  Here are a few more photos for you.


Layout #2 for the Cricut Birthday Contest

Layout #2

As we were able to create more than one layout for the contest I choose to do a second one.   This layout was created specifically for the Cricut's Birthday.  It is a shame we were not to add photos to the page, because I had some perfect bug photos for the layout. 


For this layout I used the Cricut Everyday cartridge, birthday bash, my gypsy (to do some welding) and Paperdolls.  To create the cricut I welded the head image to the body of a paperdoll.  I added a sash of ribbon with a button made from my I-top.  The Cuttle bug was pretty much just standard cuts with a bit of glitter added.  I used the baby bug cut and added a bit of ribbon for a bow.  I placed the gift box onto a tag that opens so that the gift opens.  Inside is a Gypsy- so cute.  I also cut a banner using birthday bash, little flowers were added from a punch and I used my CB and a sizzix font to add the letters to the banner.  I started by attempting to cut them from my cricut but the letters were just oo small.

Here are some more photos for you.


April 17, 2011

Mickey- disney layout

My family and I visted WDW in January.  I am quite slow to get the scrapbooks done as I have been working on a lot of vinyl and yudu lately.  I am also a PT student, mother, and am organizing a crop right now, so my crafting time is very limited.  This is a layout I completed while in Dallas at the Cricut Circle Stampede.  I love the way it turned out, and I hope you all do to.  Oh, and as many of you know I tend to scrap in multiples so that each of my boys have their own albums and I also keep a family album.  The Layouts tend to me almost identicle but the pictures tend to be specific to the album.

I used the mickey from Mickey and Friends and the word Mickey was the negative from another cut I made.  Mickey was glittered using loose glitter and my Toner Tex write and rub glue pens- I love them!  One of these days I am going to get around to putting up a tutorial about the glue!

Blake with the WDW display at the airport- but it was so cute!
Mickey

Detail on the Mickey phrase


April 14, 2011

First YUDU Project

I am so excited to share this project with all of you.  I actually completed it about a week ago, but I was waiting to post it until I was ready to share it with the gals who will be attending the Chicago Area Cricut Circle Crop on 4-30-2011.  I will be taking my personal YUDU to the crop for everyone to give it a try.  I think it turned out really well for my first YUDU project. 


Family Car Decal

Just to clarify- I created this for a friend.  My family consists of two little boys, mommy and daddy and our three turtles. 

I seem to have a real addiction for the car decals right now.  I have just completed yet another one, and wanted to share it here.  In the same fashion as the others I have done I used SCAL and my Cricut.  Thanks for looking.


April 10, 2011

another car decal

I created another car decal yesterday, this time for my husband.  The creation process was very similar to the first one I made (click here for decal).  I did some photoshop work and then cut using my cricut and SCAL.  I used silver glossy vinyl for this decal.  I have found that silver and white seem to look the best on tinted windows. I posted this to FB yesterday and had a few of my neighbors send me messages asking me to make one for them.  So, not only did I get to have some crafty time yesterday I got the satisfaction of having other people like my work enough to pay me for it!  I was on such a high.  Let me know what you think.
DSC_0060.jpg


April 9, 2011

car decals on etsy

As several of you expressed interest in the Chicago Logo Car Decal, I have listed the item on ETSY.  This should take you right there http://www.etsy.com/listing/71796984/vinyl-car-decal-cricut-circle-chicago  If you have any questions let me know.  I can certainly make other sizes or colors.  Right now I only have white and silver outdoor vinyl on hand, but I can order more if there is enough interest.

The original post can be found here http://createdbymissie.blogspot.com/2011/04/my-first-car-decal.html

April 5, 2011

My first car decal


I have been working on this project in my head for quite some time, but have finally gotten it done tonight.  This is a car decal that I created using Photoshop, SCAL, and my Cricut.  Now I know that SCAL is the "program that shall not be named", but I truely love that it expands the abilities of my Cricut machine.  I am a true lover of all things ProvoCraft.  I have a baby bug, expression, imagine, cricut cake machine, yudu, and yourstory along with about 100 cartridges and 2 gypsys.  If that doesn't scream customer loyalty I don't know what does.  That said, PC's products do not allow me to create my own projects, so when I need to I turn to SCAL


Here is the image in SCAL.  I set it up to cut 4 logos on a sheet of 12 x 12 vinyl.  For the vinyl I ordered some glossy white Orcal vinyl for outdoor use.  According to the manufactur it should last 3-7 years when applied outdoors.  I let my Cricut do the work from here.  After it was cut I carefully cut into 4 seperate pieces so the images can be used individually.  Then carefully weeded the image.  I cleaned the window of my car with baby wipes to remove the dirt and grime then with rubbing alcohol to ensure it was really clean.  I used transfer tape to apply the weeded image to my car.  That's pretty much it.  If you have any specific questions just let me know and I will be happy to answer them.

cutting into 4 seperate images

applying transfer tape


applying to car with transfer tape


the image on the rear of my car


April 4, 2011

Another shirt using HTV

My

I have been making a lot of shirts lately using my Cricut and HTV.  I know several people have asked for more information.  I promise the next time I make a project using HTV I will do a step by step tutorial.  I wish I could give that to you now, but as I made this shirt before Dallas I can't really do that today.

Here are the basics.  I did the design work using my gypsy.  Always be sure to use the mirror image of your design when cutting because you cut on the wrong side of the HTV.  If you do not have a gypsy or want to work without it you can simply use the flip button on the Expression machine.  When cutting HTV the shinny side goes against the mat, and the dull side faces up.  Be sure to use a very hot iron (or press) with no steam.  I have also found that the HTV holds up much better in the long term if you use a shirt that will not be stretched a lot. 

I do want to appoligize for the photo quality.  It seems the only photos I took of this shirt were with my cell phone.  I made this shirt to wear in Dallas for my Birthday!

Untitled


Blog Hop Pledge

First of all, I want to say thank you to Pam over at The bug bytes for proposing such a wonderful idea.  Pam is a member of the Cricut Circle; she is a  wonderful woman and inspirational crafter.  She suggested as circle members we should do our best to encourage each other by visiting other blogs regularly & leaving inspirational comments for the bloggers we visit.  I have to admit I am a bit of a silent stalker when it comes to blog hopping.  I tend to visit and admire, but I don't always leave comments.  So, I am taking the pledge suggested by Pam:

    "I pledge to visit at least 3 blogs per week and leave lovely inspiring comments that the blog owner can keep opening and sigh and read and treasure"

Of course I am not the only person who has vowed to do the same.  These other bloggers have also agreed to take the challenge.

1) thebugbytes - http://www.thebugbytes.com/
2) cindyLouscrappinWho - http://www.scrap-obsessed.blogspot.com/
3) jennykozar - http://kozfam5.blogspot.com/
4) lauren (I have to change your MB name here) - http://allthingscrafty3.blogspot.com/
5) Mandy - http://mandys-scrap.blogspot.com/
6) NadiaH-McConnell- http://withglitteringeyes.blogspot.com/
7) thunderbirdlindy - http://thunderbirdlindybydesign.blogspot.com/
8) AllisonF - http://goodybagdiva.blogspot.com/
9) brenda?princess memories? - http://princessmemoriesbybrenda.blogspot.com/
10) CraftyCassie - http://www.scrappycassie.blogspot.com/
11) JamieLindstrom - http://myamusinglife.blogspot.com/
12) ABrooks86 - http://almabrooksblog.blogspot.com/
13) MyTimeToCraft - http://mytimetocraft.blogspot.com/
14) crazy cricut lady - http://kristympaperaddict.blogspot.com/
15) Joise0602 - http://www.scrappininthewoods.blogspot.com/
16) MareBear - http://marebearscraps.blogspot.com/
17) HappyScrapper64 - [url[http://happyscrapper64.blogspot.com/[/url]
18) ShawnfromMn - http://www.shawnsfiresidecraftingroom.blogspot.com/
19) Marcjo - http://stampcutcreate.blogspot.com/
20) greengirl - http://greengirlscraps.blogspot.com/
21) JenniferHawkins2 - http://scrapaholicjen.blogspot.com/
22) Doxieluv01 - http://www.carolinescraftography.blogspot.com/
23) DanaT - http://irwdanataft.blogspot.com/
24) - JenL - http://3catsandabug.blogspot.com/
25) Gina Piazza - http://www.ginaballoons.com/
26) SandyCl - http://softsideofsandi.blogspot.com/
27) ChatterScene - http://chatterscene-mom.blogspot.com/
28) SkyCandy - http://minialbumcookbook.blogspot.com/
29) GypsyLady - http://dreamsinspireus.blogspot.com/
30) cricutfarmer - http://thepaperfarm.blogspot.com/
31) got2bcrafting - http://got2bcrafting.blogspot.com/
32) Racheal0609 - http://amy-busymomma.blogspot.com/
33) scrapper69 - [urlhttp://miislucky.blogspot.com/[/url]
34) bugginout - http://www.papercraftingchic.com/
35) nurseviper - http://scrappyrn-scrappyrn.blogspot.com/
36) LoraineJenkins - http://www.lorainespaperplayhouse.blogspot.com/
37) MelissaTodd - http://createdbymissie.blogspot.com/
38) bugaloo - http://designsbysharon.blogspot.com/
39)kut-n-print--[urlhttp://cleversomeday.wordpress.com/[/url]
40) motomomof2 - http://motomomof2.blogspot.com/
41) ScrapHappyDeb - http://www.debseclecticthoughts.blogspot.com/
42) Kreimers - http://fantabulouslypink.blogspot.com/
43) TulipCollectore - http://www.thetulipcollector.blogspot.com/
44) doodledo- http://sayanythingcrafts.blogspot.com/
45) Scrappin_RN - http://cuttin-up.blogspot.com/
46) KreativeKarla - http://kreativekarla.blogspot.com/
47) amuse me1140 - http://amusestudioandstuff.blogspot.com/
48) SweetSassyDiva - http://sweetsassydiva-gspot.blogspot.com/
49) TreeFrog - http://binkyblossoms.blogspot.com/
50) estrmnd - http://www.esthrmend.blogspot.com/
51) JJewel - http://www.littlescrapofheaven.blogspot.com/
52) scrap a holic - http://www.heatherscrapsnwraps.blogspot.com/
53) LizVellali - http://liz-lavendarandroses.blogspot.com/
54) Jo109 - http://idratherbemakingcards.blogspot.com/
55) LizaHenderson - http://www.hooscrafty.blogspot.com/
56) Prinkles - http://outta-my-minddesignsbycherylann.blogspot.com/
57) Scrapheap - http://bugginattheseams.blogspot.com/
58) NatBug – http://natbugcrafts.blogspot.com/
59) L.B – http://www.coolbeansbylb.blogspot.com/
60) TanyaAdams - http://nonnascraftcorner.blogspot.com/
61) Jessica(JMS) - http://jessicajmscreations.blogspot.com/
62) scrappinchic12 - http://www.scrappinwithjc.blogspot.com/
63) NJGrammie - http://grammiescraftroom.blogspot.com/


NOTE this is also going to be added to my blog as a seperate page so it doesn't get lost in the mix.

April 1, 2011

Disney shirts


Have you ever had one of those moments where you really thought you posted something only to realize you didn't?  In January my family and I went to Disney World because my husband wanted to run the Goofy Challenge.  It consists of a full marathon and a half marathon in the same weekend.  Well before the trip I created t-shirts for the whole family.  I shared the project on the cricut message boards, and on facebook, but I guess I neglected to post them here.  Yesterday I had someone ask me about the project and I searched high and low here, but didn't find it.  So, I figured I would post them today.

This first view is the back of my shirt, the back of Ian's shirt, and the front of Blake's shirt
The pocket design on my shirt
The front
Blake and Ian's shirts