

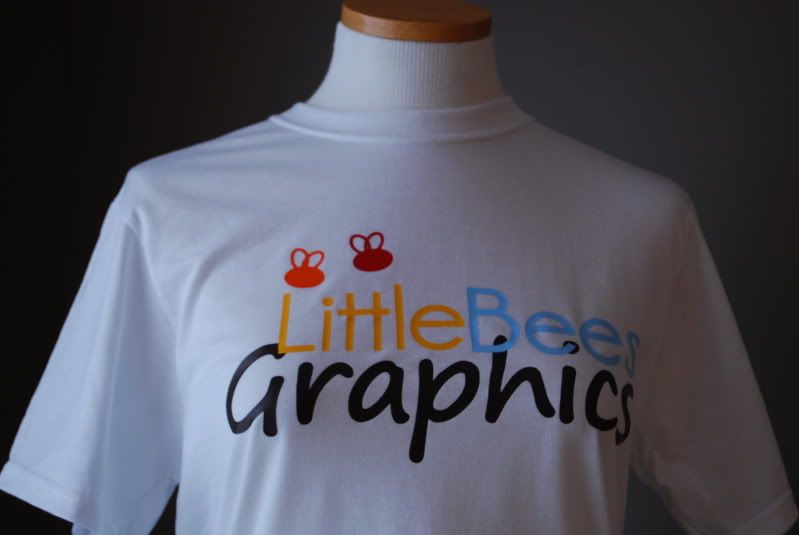
Kimberly Phillips, the owner and creative mind behind Little Bees Graphics, asked me to create a custom shirt for her using the Little Bees Logo. While, I have been making custom shirts for a long time, I generally use very simple designs that I create myself. This project allowed me to stretch my wings a bit and branch out from my normal. I hope she likes it.
Because this involved many colors and trying to align the HTV properly on the shirt, I spent a fair amount of time trying to figure out just how to do that. I thought I would share what worked for me incase any of you have has the same challenge.
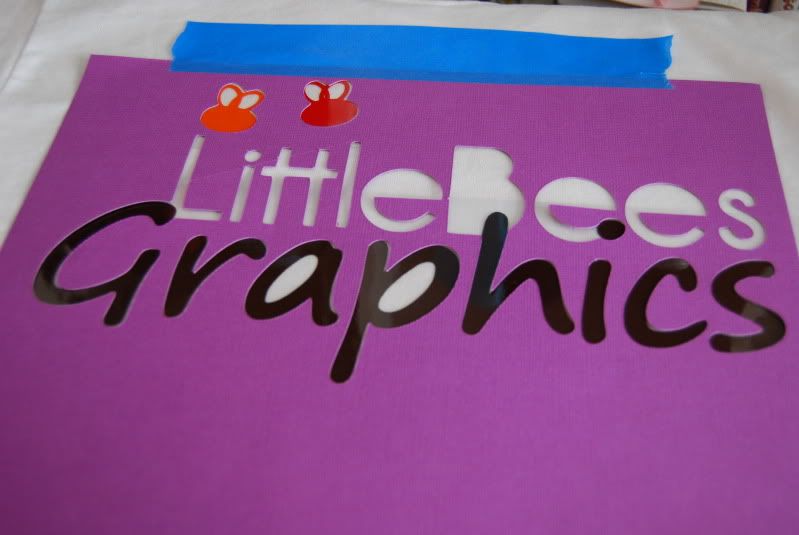
I began with the entire image in one layer (mat) in SCAL. I welded the image and cut it out of cardstock. I then used the image negative as a bit of a template for possitioning the individual cuts on the shirt. To ensure propper placement and consistancy I taped the template to the shirt with blue painters tape.
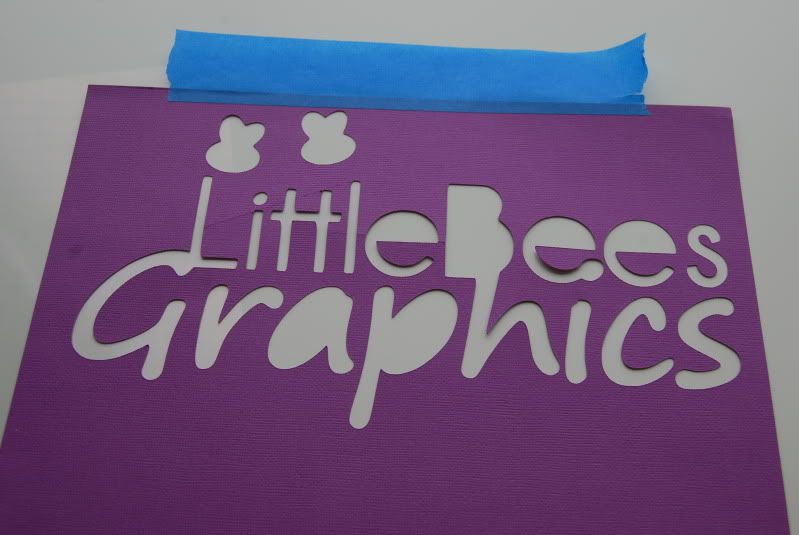
Placing the template
Aligning the first few pieces

Ready to heat press

The Adding the final colors
This shirt turned out beautiful and I am sure she will love it. TFS
ReplyDeleteThat shirt is perfect. Thank you for sharing your tips. I've only tried the HTV a couple of times and it's been awhile. I see from your labels at the bottom of the post that you get your vinyl from H H Sign Supply. I think I need to order some and try this again.
ReplyDeleteLooks so amazing! I am soooo excited to get it. I can't thank you enough!!! My husband might get jealous over this shirt!! :)
ReplyDeleteVery cool... Love the logo - nice job. Like the color combination too. Thanks for the tips, haven't tried HTV yet but I should.
ReplyDeleteOh this looks great...I so need to play with heat tranfer vinyl... LOVE
ReplyDelete